This is the multi-page printable view of this section.
Click here to print.
Return to the regular view of this page.
Tutorials
Show your user how to work through some end to end examples.
This is a placeholder page that shows you how to use this template site.
Tutorials are complete worked examples made up of multiple tasks that guide the user through a relatively simple but realistic scenario: building an application that uses some of your project’s features, for example. If you have already created some Examples for your project you can base Tutorials on them. This section is optional. However, remember that although you may not need this section at first, having tutorials can be useful to help your users engage with your example code, especially if there are aspects that need more explanation than you can easily provide in code comments.
1 - Run Code
Tutorial to run code
Install etcd
https://etcd.io/docs/v3.5/install/
Run Code
go get .
In folder cdc_agent there is main where you can decide if use ETCD for manage scalable configuration. If you need something simple you can simply pass a json filte with connectors.
func main() {
	err := godotenv.Load("../cdc_agent/.env")
	if err != nil {
		fmt.Println("Error loading .env file")
	}
	if custom_errors.IsStaticRunMode() {
		processing.ProcessStatic()
	}else{
		processing.StartWorkerNode()
	}
}
...
func IsStaticRunMode() bool {
	value := os.Getenv(models.Static)
	return value == "true"
}
...
unc ProcessStatic() {
	var syncs []cdc_shared.Sync
	path, err := os.Getwd()
	custom_errors.LogAndDie(err)
	staticFilePath := os.Getenv(models.StaticFilePath)
	dat, err2 := os.ReadFile(staticFilePath)
	custom_errors.LogAndDie(err2)

	json.Unmarshal(dat, &syncs)
	for {
		for _, sync := range syncs {
			fmt.Println(sync.SyncName)
			data.SyncData(sync, sync.Mode)
		}
		time.Sleep(1 * 3600 * time.Second)
	}
}
2 - Tutorial: Setup a data connector
The Idra platform enables data synchronization from various sources such as DBs, APIs, sensors, and message middleware. To enable it, needs setup a data connector.
Below we will analyze all the above cases.
Data synchronization between DBs
1) (Postgres/MySql with Timestamp)
Suppose we have two databases Postgres and MySql, the first one is the source, the second one is the destination.
The first thing to do is to log in so as explained in the section Web UI.
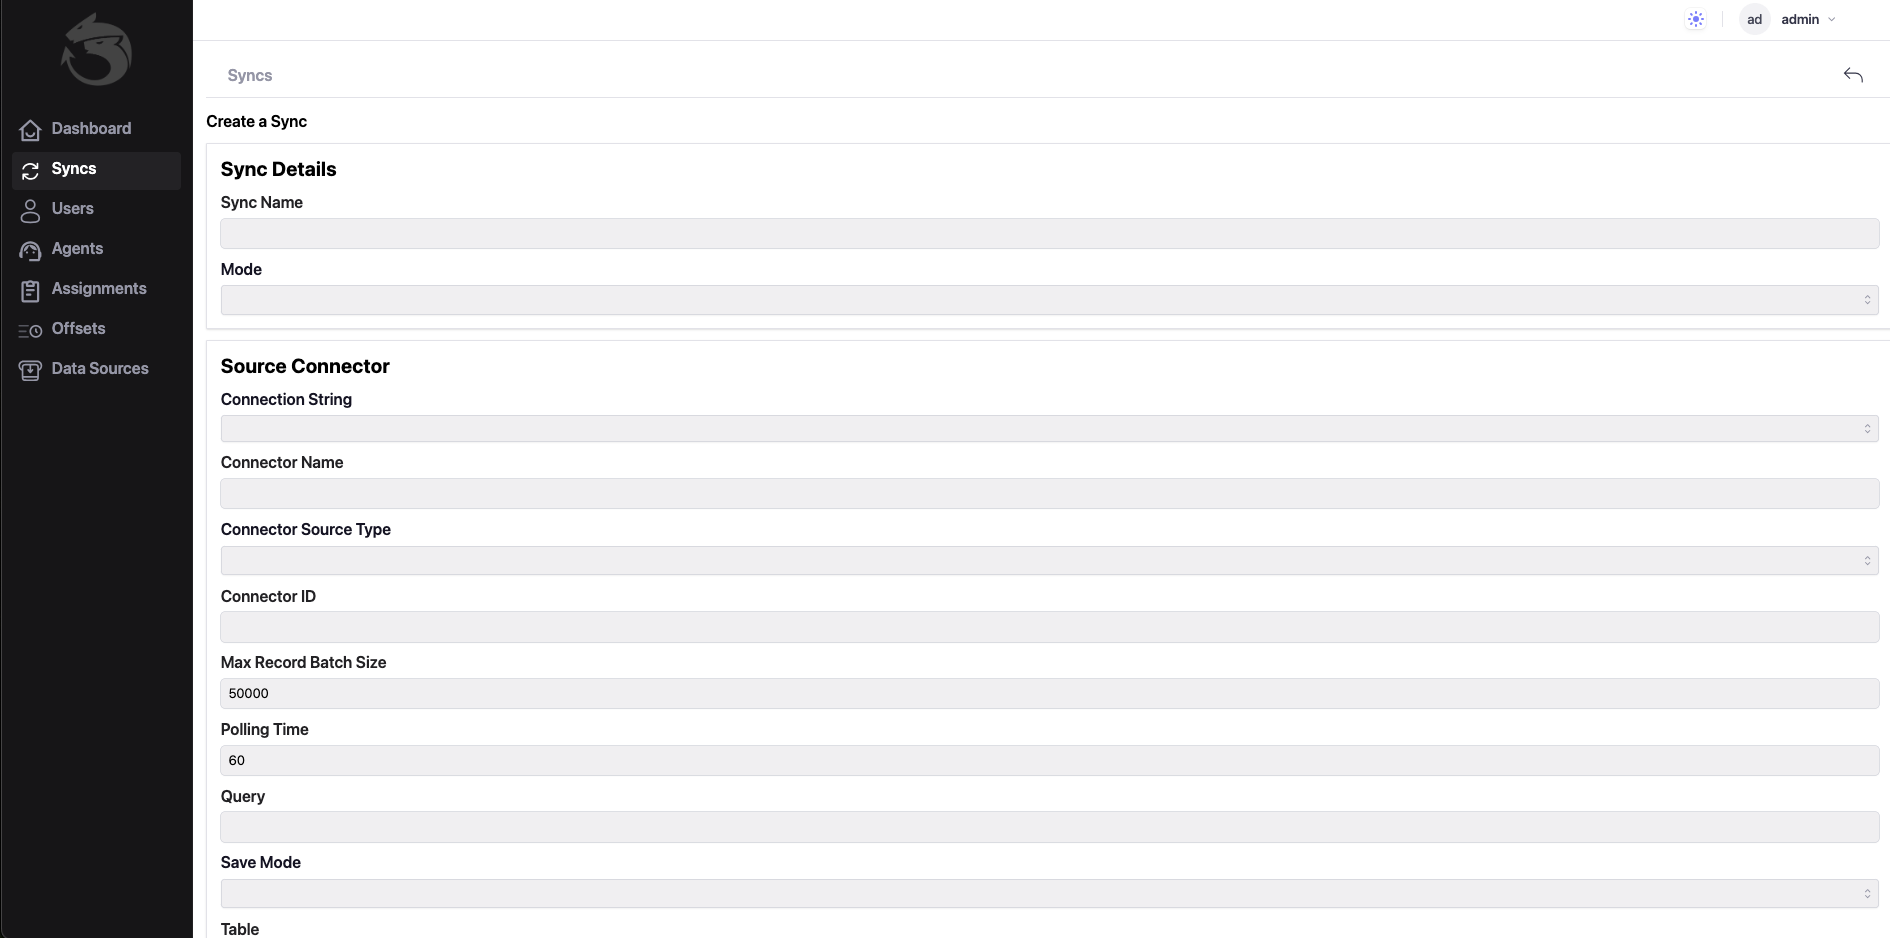
Once logged in, you need to click on the ‘Syncs’ menu item and then on the ‘Create Sync’ button, where we setup 3 sections:
Sync Details, Source Connector and Destination Connector.
In the first section, you need to assign a suitable Sync Name to the synchronization, and also choose a synchronization Mode.
With regard to the last 2 sections, where the data connector is configured, the first one is about configuring the Source Connector, the second one further down is about the Destination Connector.
As you can see in the 2 images below, mode Timestamp has been selected.
In addition, the connection strings for Postgres and MySQL have been properly configured respectively, following the rules indicated here:
GORM.
Moreover, it’s important to create the Timestamp Field in both tables of the 2 databases with the exact same name!
Finally, once all these things have been done, you can click on the ‘Create’ button (see the second image below).
Connection Strings is: host=localhost user=postgres password=mimmo dbname=postgres port=5432 sslmode=disable TimeZone=Europe/Rome

Connection Strings is: root:@tcp(127.0.0.1:3306)/scuola?charset=utf8mb4&parseTime=True&loc=Local
2) (Postgres/MySql with ConnectorId)